The Ultimate Guide Before Buying and Installing a Solar System
Electricity, water, and gas – these are truly the essentials that bring vibrancy to our lives. Without them, our existence feels incomplete. Across the globe, as climate change intensifies the summer heat, many are increasingly troubled by frequent load shedding and are turning to solar energy out of necessity. Are you currently contemplating the installation of a solar system?
Installing a solar system isn’t as straightforward as it might seem. While most of us rely on professionals for the actual work, since we’re investing our hard-earned money for our convenience, it’s crucial to conduct a thorough review before proceeding with the installation. After all, it’s your investment.
Let’s explore the components required for solar installation. But first, a vital question to consider: do you want to use a solar inverter or go without one?
We can broadly categorize solar systems into two types:
1. Inverter-Connected Solar Systems (Grid & Battery Connected)
2. Inverter-Free Solar Systems (Direct DC Based)
If you have a reasonable budget and wish to avoid separate solar wiring, an Inverter-Connected Solar System is an excellent option. Let’s delve into the components needed for a complete Inverter-Connected Solar System. Keep in mind that some items might need to be purchased separately, as smaller components might not be available at all solar sellers and you might need to visit a hardware store.
Required Components for Inverter-Connected Solar Systems (Connected to Home AC Wiring and Grid/Battery)
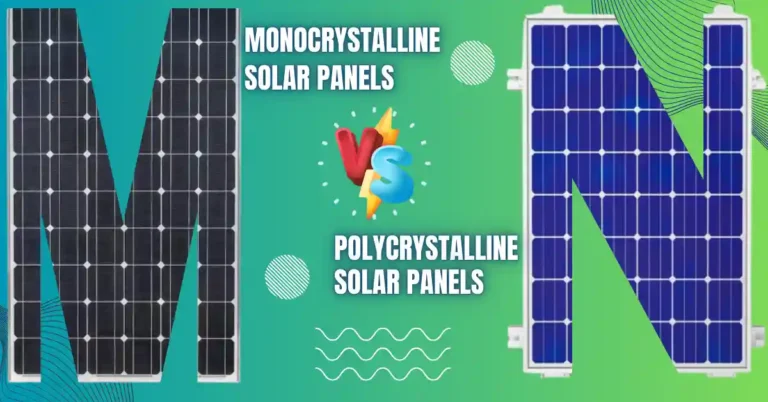
- Solar Panels: Choose between Monocrystalline or Polycrystalline. You can learn about the Differences Between Monocrystalline & Polycrystalline Solar Panels.
- Mounting Structure: Used to securely fix solar panels on the roof or ground.
- Solar Connectors (Male/Female): Used to establish connections with DC wires.
- Inverter:
- String/Hybrid Inverter: Necessary to power AC loads such as fans, lights, refrigerators, etc.
- Microinverter: An option if you want to monitor each panel individually.
- Battery System (Optional for Backup): Consider Lithium-Ion or Lead-Acid batteries.
- Charging Controller: Regulates the charging and discharging of batteries.
- AC/DC Wiring:
- DC Cables: Run from the solar panels to the inverter.
- AC Cables: Connect the inverter to your home’s wiring/meter.
- Safety Devices:
- AC/DC Circuit Breakers: Protect against overcurrent.
- Surge Protector: Safeguards against voltage spikes.
- Grounding Rod: Ensures electrical safety.
- Net Meter (For Grid-Connected Systems): Allows you to sell excess electricity back to the grid.
- Main Distribution Box: Facilitates the connection between your home’s wiring and the inverter.
Installation Procedure for Inverter-Connected Systems
- Securely mount the solar panels onto the mounting structure.
- Connect the solar panels to the inverter in series or parallel using solar connectors.
- Connect the inverter to your home’s AC wiring, ensuring connections to batteries and the main electrical system.
- Install the net meter for grid connection, if applicable.
- Protect all wiring by running it through UV-resistant conduits.
Benefits of Inverter-Connected Solar Systems
- Seamlessly power all household appliances (lights, fans, TV, air conditioners) without the need for separate wiring.
- Enjoy the convenience of backup power from batteries or the grid, providing electricity 24/7.
Now, let’s discuss a more budget-friendly option: solar systems without an inverter.
2. Solar Systems Without Inverter (Only for Running DC-Based Appliances)
- Solar Panels: Lower voltage panels such as 12V or 24V.
- Mounting Structure: For placement on the roof or ground.
- Solar Connectors: To connect solar panels in series or parallel.
- Charge Controller (MPPT/PWM): To regulate the DC power coming directly from the panels for DC loads.
- DC Battery: For backup and energy storage.
- DC Loads: Appliances that run on DC power, such as:
- 12V/24V LED lights.
- DC fans.
- Mobile chargers.
- DC Wiring: Thicker DC cables to connect solar connectors to the charge controller.
- Safety Devices:
- DC circuit breakers.
- Reverse polarity protection.
Installation Procedure for Inverter-Free Systems
- Mount the solar panels securely.
- Connect the solar panels to the charge controller using solar connectors in series or parallel.
- Connect the charge controller to the DC battery (if applicable) and then to the DC loads.
- Connect all DC devices (lights, fans) using separate DC wiring.
- Install DC fuses to prevent overloading.
Comparison: Inverter-Connected vs. Inverter-Free Solar Systems
| Feature | Inverter-Connected Solar Systems | Inverter-Free Solar Systems (DC Only) |
| Appliances Powered | All AC household appliances | Limited to specific DC appliances |
| Wiring | Integrates with existing AC wiring | Requires separate DC wiring for DC loads |
| Backup | Battery and/or grid options | Primarily battery-based |
| Cost | Generally higher initial cost | Lower initial cost |
| Complexity | More complex installation and components | Simpler installation and fewer components |
| Versatility | Greater versatility in powering various devices | Limited to DC-compatible devices |
Conclusion
The initial investment for a solar system can be quite significant, often beyond the reach of the average person. This is why many pool their savings to install solar in their homes, driven by prolonged power outages and intense heat. Utilizing solar power can drastically reduce your electricity unit consumption, saving you from hefty monthly bills.
When purchasing a solar system, it’s advisable to bring along someone knowledgeable to ensure you get good quality products at fair prices. Most importantly, after the complete installation of your solar system, remember to clean the panels regularly, whether it’s nighttime or when there’s no sunshine. For battery systems, check the water level every half to one month and replenish with distilled water as needed. I hope you found this guide helpful!
FAQS
☀️ Solar Panel Installation
How to install solar panels?
Installing solar panels involves several key steps:
Site Assessment: Evaluate your location to determine the best position for maximum sunlight exposure.
Design and Permitting: Create a system design tailored to your energy needs and obtain necessary permits from local authorities.
Mounting System Installation: Install the racking or mounting system securely to your roof or ground structure.
Panel Installation: Attach the solar panels to the mounting system, ensuring proper alignment and tilt for optimal sun exposure.
Electrical Wiring: Connect the panels to the inverter and then to your home’s electrical system, following safety protocols.
Inspection and Activation: Have the system inspected by local authorities and your utility company before turning it on.
How to install solar panels on a roof?
Roof installation requires careful planning:
Roof Evaluation: Ensure your roof can support the weight of the panels and has a lifespan that matches or exceeds the panels’.
Mounting System: Use appropriate mounting hardware compatible with your roof type (e.g., shingle, tile, metal).
Weatherproofing: Seal all penetrations to prevent leaks.
Safety Measures: Use fall protection equipment and follow safety guidelines during installation.
How to install solar panels yourself?
DIY installation is possible but requires:
Knowledge: Understanding of electrical systems and local codes.
Permits: Securing necessary approvals.
Safety: Using proper equipment and precautions.
Consider the risks and consult professionals if unsure.
🌙 Solar Panel Functionality
Do solar panels work at night?
No, solar panels require sunlight to generate electricity. At night, they don’t produce power. However, systems with battery storage can provide electricity during nighttime by storing excess energy generated during the day.
Do solar panels work on cloudy days?
Yes, but their efficiency decreases. Cloud cover reduces the amount of sunlight reaching the panels, leading to lower energy production.
Does a solar panel have to be in direct sunlight?
Direct sunlight maximizes efficiency, but panels can still generate power under diffuse light conditions, albeit at reduced output.
⚙️ Technical Specifications
How to check solar panel wattage?
Multiply the panel’s voltage (V) by its current (A) to get wattage (W). For example, a panel with 20V and 5A produces 100W.
How to check solar panel voltage?
Use a multimeter:
Set to DC voltage.
Connect the positive lead to the panel’s positive terminal and the negative lead to the negative terminal.
Read the voltage output on the display.
How to check solar panel amps?
Use a multimeter set to DC current (amps):
Connect the multimeter in series with the panel’s output.
Ensure the panel is under sunlight for accurate measurement.
🔌 System Components and Configuration
How to make a solar connection?
Connect the solar panel to a charge controller, then to a battery, and finally to an inverter if AC power is needed. Ensure all connections are secure and correctly polarized.
How to connect solar panel to home appliances?
Use an inverter to convert DC from the solar panels to AC, then connect to your home’s electrical panel. It’s crucial to have a transfer switch and proper safety mechanisms in place.
How to wire a solar panel to a LED light?
Connect the panel to a charge controller, then to a battery, and finally to the LED light. Ensure voltage compatibility between components.
How to wire solar panels with micro inverters?
Each panel connects to its micro inverter, which then connects to a trunk cable leading to the main AC panel. This setup allows for individual panel monitoring and optimization.
🧼 Maintenance and Safety
How to clean solar panels?
Use a soft brush or sponge with mild soap and water. Avoid abrasive materials and high-pressure water, which can damage the panels. Clean during cooler parts of the day to prevent thermal shock.
How to clean solar panels safely?
Ensure you’re using proper safety equipment, especially when working on rooftops. Consider hiring professionals for hard-to-reach installations.
When to clean solar panels?
Clean panels at least once or twice a year, or more frequently if you notice a drop in energy production or if you live in a dusty area.
🔋 Energy Storage and Management
Can we charge a battery directly from a solar panel?
It’s not recommended. A charge controller regulates the voltage and current from the panel to safely charge the battery, preventing overcharging or damage.
How to charge solar batteries?
Connect the solar panel to a charge controller, then to the battery. Ensure all components are compatible in terms of voltage and current ratings.
How to store electricity from solar panels?
Use batteries (like lithium-ion or lead-acid) to store excess energy generated during the day for use at night or during outages.
How to charge multiple batteries with one solar panel?
Use a charge controller capable of handling multiple batteries, ensuring they are connected in a configuration (series or parallel) that matches the system’s voltage and capacity requirements.
📏 System Sizing and Calculation
How to calculate the charging time of a battery by a solar panel?
Divide the battery’s capacity (Ah) by the charging current (A) from the panel. Adjust for efficiency losses (typically around 15-20%).
How to calculate load for a solar system?
Sum the wattage of all devices you plan to power, multiply by the number of hours each device runs daily to get daily energy consumption in watt-hours.
How to calculate a solar system?
Divide your daily energy consumption by the average daily sunlight hours in your area to determine the necessary system size in kilowatts.
How to calculate the solar irradiance?
Use a pyranometer to measure the solar power received per unit area (W/m²) at your location.
📚 Learning and Understanding Solar Energy
8. How to learn solar panel installation?
You can learn through:
Online Courses: Platforms like Coursera and Udemy offer courses on solar installation.
Vocational Training: Enroll in programs at technical schools or community colleges.
Certifications: Pursue certifications like NABCEP for professional recognition.
Who discovered the solar system?
The heliocentric model, placing the Sun at the center of the solar system, was proposed by Nicolaus Copernicus in the 16th century. However, the understanding of the solar system has evolved over centuries with contributions from many astronomers.
Who invented the solar system?
The solar system wasn’t invented; it’s a natural formation resulting from gravitational forces and cosmic events over billions of years.